레이블이 flyrocketman인 게시물을 표시합니다. 모든 게시물 표시

2016년 3월 27일 일요일

make game as corona sdk (Fly a rocketman)(6) - custom Font


이런 핑게 저런 핑게 대다보니 요즘 통 작업을 못진행한것 같네요.
2016 project인 만큼 빨리 마무리 될 수 있도록 힘을 내보도록 하겠습니다.

사용법은 아래에서 참고 하면됩니다.

https://docs.coronalabs.com/api/library/display/newText.html

두가지 방법으로 사용이 가능하며,
display.newText( [parentGroup,] text, x, y, font [, fontSize] )
display.newText( [parentGroup,] text, x, y [, width, height], font [, fontSize] )
display.newText( options )
font 인자는 아래의 값을 이용 할 수 있습니다.
font (required)
StringUserdata, or Constant. This can be one of the following:

오늘 주제에서는 custom font 이므로 font 를 외부에서 가져왔다고 할때
string형태로 입력을 하게됩니다.

예제입니다.
-- Standard text object
local displayText = display.newText( "Hello World", 150, 80, "CoolCustomFont.ttf", 24 )

저는 용량이 작고 멋있는걸로 "homespun.ttf" 폰트를 구했습니다.
일단 license관련해서 꼭 확인해서 사용하시기 바랍니다.

homespun.ttf
---------------
-The font(s) in this zip file were created by me (Brian Kent).  All
of my Fonts are Freeware, you can use them any way you want to
(Personal use, Commercial use, or whatever).


fota관련해서는 코드를 추가하였습니다.
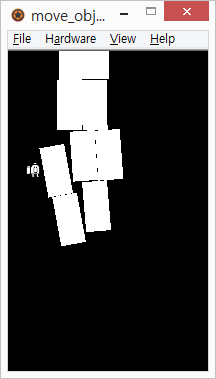
화면에서 날아오는 글자라고 생각하고 구현하였습니다. 예를 들어 점수 같은게 날아올 수 있습니다.

    self.typeCreateData = {
   -- type 1
   --    name , x  , y ,xsz,ysz,xspeed,categoryBits,maskBits,etc
    {
    {"rect",-100, 30, 40, 80, -300,self.blockCategory,self.blockMask},
    {"rect", 100,-30, 40, 80, -300,self.blockCategory,self.blockMask},
    },
    -- type 2
    {
    {"rect",-100,  0, 40, 80, -300,self.blockCategory,self.blockMask},
    },
    -- type 3
    {
    {"rect",-100,  0, 40, 80, -300,self.blockCategory,self.blockMask},
    },
    -- type 4
    {
    {"font",-100,  0, 40, 80, -200,self.blockCategory,self.blockMask,24,"abcDEF123","homespun"},
    },
    }


function M:runEvent()
local y = self.data[self.currentGroupNum][self.currentPC][2]
local gtype = self.data[self.currentGroupNum][self.currentPC][3]

if(self.data[self.currentGroupNum][self.currentPC][4]=="randomType")then
gtype = random(self.data[self.currentGroupNum][self.currentPC][5],self.data[self.currentGroupNum][self.currentPC][6])
end

local firstTime = self.typeActionData[gtype][1][1]

local cdata = self.typeCreateData[gtype]
local count = #cdata
for i = 1, count, 1 do
local object
if( cdata[i][1] == "rect" ) then
object = display.newRect( self.cwidth + self.cwidth/2 + cdata[i][2], y + cdata[i][3], cdata[i][4], cdata[i][5] )
physics.addBody(object,"dynamic",{ density=1,filter={categoryBits=cdata[i][7],maskBits=cdata[i][8]} })
object:setLinearVelocity(cdata[i][6],0)
elseif( cdata[i][1] == "font" ) then
object = display.newText( cdata[i][10], self.cwidth + self.cwidth/2 , y, cdata[i][11], cdata[i][9] )
physics.addBody(object,"dynamic",{ density=1,filter={categoryBits=cdata[i][7],maskBits=cdata[i][8]} })
object:setLinearVelocity(cdata[i][6],0)
end
if( object~=nil ) then
object.name = "block"
self.objCount = self.objCount + 1
print("objs:",self.objCount)
end

if( object~=nil and firstTime >= 0 ) then
object.actionPC = 1
object.actionObjectType = gtype;
--print("fristTime",firstTime)
if( firstTime == 0 ) then
self:timerActionCB(object)
else
timer.performWithDelay(firstTime, function() self:timerActionCB(object) end)
end
end
end
end


2016년 2월 20일 토요일

make game as corona sdk (Fly a rocketman)(5) - categoryBits,maskBits


앞에서 사용된 이미지를 살펴보면 아래와 같습니다.


위 그림에서 보면 block들이 붙어서 움직일때 블럭간에 충돌이 일어나서 블럭들이 움직임이 어색해 보일수도 있습니다.
이때에 있는것이 특정 블럭간에 충돌 방지가 필요하게 됩니다.
physics.addBody 함수에서 categoryBits,maskBits parameter를 추가해서 충돌 범위를 정할 수 있습니다.

기존
physics.addBody(object,"dynamic",{ density=1 })
변경
physics.addBody(object,"dynamic",{ density=1,filter={categoryBits=2,maskBits=1} })

내용은 간단합니다.
categoryBits 는 생성하는 physics object의 카테고리 즉 분류 bit가 됩니다.
maskBits 는 충돌하게 되는 카테고리 즉 분류를 설정하는 곳입니다.

예를 들어서 3개의 object는 categoryBits=2 => 2진수로 10 이 됩니다. 그리고 충돌은 1 이 므로 3개의 객체는 충돌이 일어나지 않으므로 붙어다닐 수 있습니다.
physics.addBody(object1,"dynamic",{ density=1,filter={categoryBits=2,maskBits=1} })
physics.addBody(object2,"dynamic",{ density=1,filter={categoryBits=2,maskBits=1} })
physics.addBody(object3,"dynamic",{ density=1,filter={categoryBits=2,maskBits=1} })

player는 categoryBits가 1 이라고 한다면 player는 object1,object2,object3 과 충돌 검사를 할 수 있습니다.
기존 소스에서 해당 부분만 변경하면 충돌시 아래 그림과 같게 됩니다.


2016년 2월 12일 금요일

make game as corona sdk (Fly a rocketman)(4) - performWithDelay

이번에 작업할 내용은 이벤트가 발생하게 되면 하나의 object를 생성하는게 아니라 그룹형태로 생성 할 목록을 지니도록 할 예정입니다.

지난번에 group 0 이면 특정 객체를 생성하게 구현하였는데 group 번호에 따라 다른 동작이 이루어 지도록 구현 하였습니다.

데이터의 예제가 아래와 같습니다.
self.data 안에 있는 마지막에 있는 type 이 1이면 생성할때는 self.typeCreateData 를 이용하여 rect 2개를 생성하고,
-- type 1
{
{"rect",-100, 30},
{"rect", 100,-30},
일정 시간 후에 동작하는 움직임 제어를 위해서는,
self.typeActionData 자료를 참고하여 구현하였습니다.
self.typeActionData = {
-- type 1
{
--time, action, param
{700,"move_y",-100},
{500,"move_y",200},

아래는 전체 data 입니다.


self.data = {
  -- group 1
  {
  -- tick, y, type
   {30,100,1},
   {30,200,2},
   {30,300,1}
  },
  -- group 2
  {
  -- tick, y, type
   {30,100,1},
   {30,200,2},
   {0 ,100,1}, -- todo
   {0 ,150,1}, -- todo
   {0 ,200,1}, -- todo
   {0 ,250,1}, -- todo
   {30,300,1}
  },
    }

    self.typeActionData = {
     -- type 1
     {
      --time, action, param
      {700,"move_y",-100},
      {500,"move_y",200},
     },
     -- type 2
     {
      --tick, action, param
      -- -1 is nothing
      {-1},
     },
    }

    self.typeCreateData = {
     -- type 1
     {
      {"rect",-100, 30},
      {"rect", 100,-30},
     },
     -- type 2
     {
      {"rect",-100,  0},
     },
    }


이전시간에 tick을 이용하여 self.data 를 호출 하도록 구현하였습니다.
self.typeActionData 의 경우 일정 시간 후 동작해야 하므로 timer를 이용하였습니다.
corona sdk에서는 performWithDelay 함수가 준비되어 있습니다.

해당 함수를 사용하면서 주의해야 할것은 listener가 parameter 가 존재하는 경우가 있는 경우 처리를 제대로 해줘야합니다.

https://docs.coronalabs.com/api/library/timer/performWithDelay.html

즉, 비슷하면서도 헷갈리는 동작입니다만, 시험을 해보면 오류가 발생하지는 않으나, 후자의 경우 Delay없이 실행되게 됩니다.
따라서 디버깅이 쉽지 않는 경우가 있습니다.

timer.performWithDelay(firstTime, function() self:timerActionCB(object) end)
timer.performWithDelay(firstTime, self:timerActionCB(object))
위의 예제에서는 빨간색 상단이 맞는 것입니다.

인자가 있는 경우 아래 두가지 용법을 잘 기억해 두어야 합니다.
local tm = timer.performWithDelay( 1000, onTimer )
-- Assign a table of parameters to the "tm" handle
tm.params = { myParam1 = "Parameter1", myParam2 = "Parameter2" }
local myClosure = function() return spawnBall( randomPosition ) end
timer.performWithDelay( 2000, myClosure, 1 )

triggerGroup.lua 입니다. 나머지는 앞쪽 소스 참고하시기 바랍니다.


local M = {}
local random = math.random

function M:init()
 print("init")
 math.randomseed( os.time() )
 self.cwidth = display.contentWidth
 self.frameTick = 0
 self.data = {
  -- group 1
  {
  -- tick, y, type
   {30,100,1},
   {30,200,2},
   {30,300,1}
  },
  -- group 2
  {
  -- tick, y, type
   {30,100,1},
   {30,200,2},
   {0 ,100,1}, -- todo
   {0 ,150,1}, -- todo
   {0 ,200,1}, -- todo
   {0 ,250,1}, -- todo
   {30,300,1}
  },
    }

    self.typeActionData = {
     -- type 1
     {
      --time, action, param
      {700,"move_y",-100},
      {500,"move_y",200},
     },
     -- type 2
     {
      --tick, action, param
      -- -1 is nothing
      {-1},
     },
    }

    self.typeCreateData = {
     -- type 1
     {
      {"rect",-100, 30},
      {"rect", 100,-30},
     },
     -- type 2
     {
      {"rect",-100,  0},
     },
    }

    self.currentGroupNum = nil
    self.currentPC = nil
    self.nextEventTick = 0
end

function M:changeGroup()
 self.currentGroupNum = random(1,#self.data)
 print("group selected:",self.currentGroupNum)
 self.currentPC = 1;
 -- get tick
 self.nextEventTick = self.data[self.currentGroupNum][self.currentPC][1]
end

function M:loadNextInfo()
 self.frameTick = 0
 self.currentPC = self.currentPC + 1
 if( self.currentPC > #self.data[self.currentGroupNum] ) then
  -- all group end
  self:changeGroup()
 else
  self.nextEventTick = self.data[self.currentGroupNum][self.currentPC][1]
 end
end

function M:timerActionCB(selfobj)
 print("aa",selfobj,selfobj.actionPC);
 if( selfobj.actionPC == nil ) then return end

 --object:removeSelf()
 local action = self.typeActionData[selfobj.actionObjectType][selfobj.actionPC]
 if(action[2]=="move_y")then
  local vx, vy = selfobj:getLinearVelocity()
  selfobj:setLinearVelocity(vx,vy+action[3])
  print("action")
 end
 selfobj.actionPC = selfobj.actionPC + 1
 if( #self.typeActionData[selfobj.actionObjectType] >= selfobj.actionPC ) then
  timer.performWithDelay(self.typeActionData[selfobj.actionObjectType][selfobj.actionPC][1], function() self:timerActionCB(selfobj) end)
  --timer.performWithDelay(self.typeActionData[selfobj.actionObjectType][selfobj.actionPC][1], self:timerActionCB(selfobj))
 end
end

function M:runEvent()
 local y = self.data[self.currentGroupNum][self.currentPC][2]
 local gtype = self.data[self.currentGroupNum][self.currentPC][3]
 local firstTime = self.typeActionData[gtype][1][1]
 
 local cdata = self.typeCreateData[gtype]
 local count = #cdata
 for i = 1, count, 1 do
  local object
  if( cdata[i][1] == "rect" ) then
   object = display.newRect( self.cwidth + self.cwidth/2 , y, 40, 80 )
   physics.addBody(object,"dynamic",{ density=1 })
   object:setLinearVelocity(-300,0)
  end
  if( object~=nil and firstTime >= 0 ) then
   object.actionPC = 1
   object.actionObjectType = gtype;
   print("fristTime",firstTime)
   timer.performWithDelay(firstTime, function() self:timerActionCB(object) end)
   --timer.performWithDelay(firstTime, self:timerActionCB(object))
  end
 end
end

function M:tick()
 self.frameTick = self.frameTick + 1

 if( self.currentGroupNum == nil ) then
  -- need to change group
  self:changeGroup()

 end
 if( self.frameTick > self.nextEventTick ) then
  repeat
   self:runEvent()
   self:loadNextInfo()
  until ( self.nextEventTick ~= 0)
 end


end

return M


2016년 2월 5일 금요일

make game as corona sdk (Fly a rocketman)(3)


이번에는 배경이 날라오는 것을 구현하도록 하겠습니다.

랜덤으로 무조건 물체가 날아 오는것은 재미가 없을겁니다.
그래서 몇개의 그룹을 만들고 점차 어려워 지게 할 예정인데요.
A 그룹 B 그룹 C 그룹 D 그룹이 있다면 처음에는 A-B-C 에서 결정이 되다가 시간이 지나면 B-C-D 그룹에서 결정이 되고 점차 어려워질 수 있도록 할예정인데 일단은 몇개의 그룹을 랜덤하게 설정하고 그룹이 끝나면 다음 그룹으로 넘어가도록 구현해볼 예정입니다.

이전과 다른 점은 triggerGroup.lua 라는것을 만들었습니다.. 이것은 일반 언어의 class와 비슷한 개념으로 이해하면 됩니다.
해당 모듈에서는 물체들의 움직을 만들어 냅니다.

기존 소스와 다른점은 모듈을 추가한 소스와
local trigger = require("triggerGroup")
trigger:init()

eventLoop 내에서 trigger:tick()함수를 호출하는 부분만 다릅니다.

local function eventLoop()
    trigger:tick()
    local vx, vy = player:getLinearVelocity()
if( vy < 100 )then
player:setLinearVelocity( vx, vy+7 )
end
end

아래는 main.lua의 전체 소스입니다.


display.setStatusBar( display.HiddenStatusBar )
CWidth = display.contentWidth

-- Physics
local physics = require ("physics")
physics.start()
--physics.setDrawMode("hybrid")
physics.setGravity( 0, 0 )

local trigger = require("triggerGroup")
trigger:init()

local player_outline = graphics.newOutline( 2, "my.png" )
local player = display.newImage("my.png")
player.x = 40
player.y = 150

physics.addBody(player,"dynamic",{ outline=player_outline,density=10 })
player.isFixedRotation = true


function flyUp(event)
 if event.phase == "began" then
     player:applyForce(0, -1500, player.x, player.y)
 end
end

Runtime:addEventListener("touch", flyUp)
 
local function eventLoop()
    trigger:tick()
    local vx, vy = player:getLinearVelocity()
 if( vy < 100 )then
  player:setLinearVelocity( vx, vy+7 )
 end

end

Runtime:addEventListener( "enterFrame", eventLoop ) 


eventLoop가 일정 프레임으로 진입하게되면 아래 tick시점에 이벤트가 일어납니다.
-- group 1
{
-- tick, y, type
{30,100,0},
{30,200,0},
{30,300,0}
},
-- group 2
{
-- tick, y, type
{30,100,0},
{30,200,0},
{30,300,0}
},


아래는 triggerGroup.lua 입니다.

local M = {}
local random = math.random

function M:init()
 print("init")
 math.randomseed( os.time() )
 self.cwidth = display.contentWidth
 self.frameTick = 0
 self.data = {
 -- group 1
 {
 -- tick, y, type
  {30,100,0},
  {30,200,0},
  {30,300,0}
 },
 -- group 2
 {
 -- tick, y, type
  {30,100,0},
  {30,200,0},
  {30,300,0}
 },
    }
    self.currentGroupNum = nil
    self.currentPC = nil
    self.nextEventTick = 0
end

function M:changeGroup()
 self.currentGroupNum = random(1,#self.data)
 print("group selected:",self.currentGroupNum)
 self.currentPC = 1;
 -- get tick
 self.nextEventTick = self.data[self.currentGroupNum][self.currentPC][1]
end

function M:loadNextInfo()
 self.frameTick = 0
 self.currentPC = self.currentPC + 1
 if( self.currentPC > #self.data[self.currentGroupNum] ) then
  -- all group end
  self:changeGroup()
 else
  self.nextEventTick = self.data[self.currentGroupNum][self.currentPC][1]
 end
end

function M:runEvent()
 local y = self.data[self.currentGroupNum][self.currentPC][2]
 local gtype = self.data[self.currentGroupNum][self.currentPC][3]
 if( gtype == 0 ) then
  local object = display.newRect( self.cwidth + self.cwidth/2 , y, 40, 80 )
  physics.addBody(object,"dynamic",{ density=1 })
  object:setLinearVelocity(-300,0)
 end
end


function M:tick()
 self.frameTick = self.frameTick + 1

 if( self.currentGroupNum == nil ) then
  -- need to change group
  self:changeGroup()

 end
 if( self.frameTick > self.nextEventTick ) then
  self:runEvent()
  self:loadNextInfo()
 end

end

return M

실행화면 입니다.

물체와 부딧히면 아래와 같은 장면이 연출 됩니다.


2016년 1월 29일 금요일

make game as corona sdk (Fly a rocketman)(2)

주인공 움직임 만들기

앞에 기획에 이어서 이번에는 주인공 입력에 대한 부분을 구현 해보겠습니다.

중력은 physics.setGravity( 0, 0 ) 0 으로 설정합니다. 이렇게 하는 이유는 스크롤을 위해서 그렇습니다. 스크롤은 앞에서 날라오는 물체가 될텐데 중력이 적용되면 아래로 떨어지면서 날라오게됩니다.
그리고 주인공은 my.png로 대충 그립니다.
물리 관련해서는 addBody를 사용해 주며, isFixedRotation=true 설정을 해줍니다.
그러면 jump하는동안에 회전하지 않게 됩니다.
터치 핸들러에 applyForce로 y축으로 힘을 넣도록 합니다.
아래로 내려오는 중력 가속도가 없기 때문에 이벤트 루프 안에서 아래와 같은 코드를 넣습니다. 즉 프레임 마다 속도를 올려 주다가 일정 속도가 되면 속도 증가가 안되도록 합니다.
 if( vy < 100 )then
  player:setLinearVelocity( vx, vy+7 )
 end

main.lua 소스는 아래와 같습니다.

display.setStatusBar( display.HiddenStatusBar )

-- Physics
local physics = require ("physics")
physics.start()
--physics.setDrawMode("hybrid")
physics.setGravity( 0, 0 )

local player_outline = graphics.newOutline( 2, "my.png" )
local player = display.newImage("my.png")
player.x = 40
player.y = 150

physics.addBody(player,"dynamic",{ outline=player_outline,density=10 })
player.isFixedRotation = true


function flyUp(event)
 if event.phase == "began" then
     player:applyForce(0, -1500, player.x, player.y)
 end
end

Runtime:addEventListener("touch", flyUp)
 
local function eventLoop()
    local vx, vy = player:getLinearVelocity()
 if( vy < 100 )then
  player:setLinearVelocity( vx, vy+7 )
 end
end

Runtime:addEventListener( "enterFrame", eventLoop ) 

my.png


사용된 config.lua 는 아래와 같습니다.  돌아다니다가 구한 만능 config라고 합니다.
기본적으로 가로세로 정보는 아래와 같기 때문에 이미지 크기도 아래에 맞춰서 적당한 이미지를 사용하도록 하겠습니다.

            width = 320,
            height = 570,

if string.sub(system.getInfo("model"),1,4) == "iPad" then
    application = 
    {
        content =
        {
            width = 360,
            height = 480,
            scale = "letterBox",
            xAlign = "center",
            yAlign = "center",
            imageSuffix = 
            {
                ["@2x"] = 1.5,
                ["@4x"] = 3.0,
            },
        },
        notification = 
        {
            iphone = {
                types = {
                    "badge", "sound", "alert"
                }
            }
        }
    }

elseif string.sub(system.getInfo("model"),1,2) == "iP" and display.pixelHeight > 960 then
    application = 
    {
        content =
        {
            width = 320,
            height = 568,
            scale = "letterBox",
            xAlign = "center",
            yAlign = "center",
            imageSuffix = 
            {
                ["@2x"] = 1.5,
                ["@4x"] = 3.0,
            },
        },
        notification = 
        {
            iphone = {
                types = {
                    "badge", "sound", "alert"
                }
            }
        }
    }

elseif string.sub(system.getInfo("model"),1,2) == "iP" then
    application = 
    {
        content =
        {
            width = 320,
            height = 480,
            scale = "letterBox",
            xAlign = "center",
            yAlign = "center",
            imageSuffix = 
            {
                ["@2x"] = 1.5,
                ["@4x"] = 3.0,
            },
        },
        notification = 
        {
            iphone = {
                types = {
                    "badge", "sound", "alert"
                }
            }
        }
    }
elseif display.pixelHeight / display.pixelWidth > 1.72 then
    application = 
    {
        content =
        {
            width = 320,
            height = 570,
            scale = "letterBox",
            xAlign = "center",
            yAlign = "center",
            imageSuffix = 
            {
                ["@2x"] = 1.5,
                ["@4x"] = 3.0,
            },
        },
  LevelDirectorSettings = 
  {
   imagesSubFolder = ".",
   levelsSubFolder = ".",
  }
    }
else
    application = 
    {
        content =
        {
            width = 320,
            height = 512,
            scale = "letterBox",
            xAlign = "center",
            yAlign = "center",
            imageSuffix = 
            {
                ["@2x"] = 1.5,
                ["@4x"] = 3.0,
            },
        },
        notification = 
        {
            iphone = {
                types = {
                    "badge", "sound", "alert"
                }
            }
        },
  LevelDirectorSettings = 
  {
   imagesSubFolder = ".",
   levelsSubFolder = ".",
  }
    }
end

2016년 1월 22일 금요일

make game as corona sdk (Fly a rocketman)(1)

CORONA SDK로 게임 만들기

올해(2016) 주제는 쉽고 중독성 있으면서 재미있는 판타스틱한 게임 도전이 목표입니다.
그래서 곰곰히 거의 15일만에 계획을 세웠습니다.

진행하면서 배우는 공부하게되는 내용은 아래에 정리해 보았습니다.
@랭킹시스템
@물리충돌

기본 동작은 아래와 같습니다.
!!기획 스케치 해보았습니다.

조작법은 1버튼 게임으로 아주 쉽게 되어있습니다. 이런 유형은 Flappy게임 방식으로 헬리콥터가 나오는 버전도 있고 굉장히 다양하게 있습니다.

이 부분이 차이점입니다. 
다가오는 물체들이 회전을 하거나 돌처럼 날라오는데 피해야 합니다. 가로 형태의 슈팅 게임이라고 보면 됩니다. 
물리엔진을 이용해서 좀 더 사실적으로 만들 예정이고 부딧히더라도 뒤로 밀려나가게 되는데 화면밖으로만 안나가면 계속 플레이가 가능합니다.
또한 로켓연료를 안먹으면 연료가 떨어져서 위로 올라갈 수가 없습니다.
여유가 된다면 능력치가 다른 캐릭터를 만들 예정입니다.

게임 기획은 여기까지 입니다.
다음에는 하나씩 test 어플로 구현 예정입니다.

- 물리객체 날라오게 만들기
- 주인공에 날라오는 물리 객체맞으면 뒤로 밀리게 구현 가능한지?
- 물리객체의 생성을 나타내는 맵제작툴 고민하기